Toothbrushing for Toddlers!

Tamara Sevigny • October 24, 2022

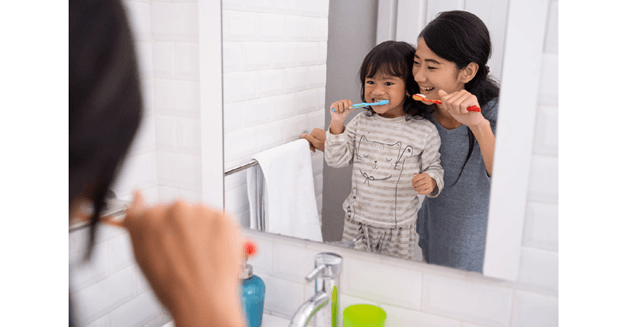
In Montessori, we put a lot of emphasis on young children learning basic self-care skills. A big part of self-care is something we do every day, at least twice a day: brushing our teeth! This is a tricky one, though, because we want to teach independence while also ensuring that our children’s teeth are clean and cavity-free.


Because COVID has brought about some shifts in the practical life activities that traditionally happen in our early childhood classrooms, we thought we would combine a “materials spotlight” with a little “how to at home.” 


It’s important to remember that when we introduce toothbrushing, we are not only helping young children develop lifelong oral hygiene habits, but we are also helping them develop a sense of capability. As parents and caregivers, we partner in the process so that years later our children haven’t become dependent upon us for a necessary skill. 


In showing and supporting toothbrushing, we want to really isolate and slow down each part of the process. As adults, we often move quickly through the activity. We don’t have to think about the separate steps of what we are doing, because we can rely upon habit and muscle memory. Young children, however, are consciously working through each component. Thus, we have to be very intentional about demonstrating the procedure. In the process, we also highlight what we call “points of interest” which are like little benchmarks that focus children’s attention and help them remember key components.


As with all practical life activities, we want the experience to be meaningful and embedded in a real-life context. Thus, we introduce toothbrushing when it makes sense: after eating!


After enjoying a snack or a meal, we invite a child to the sink to brush their teeth. We often make a point of noticing that we have just eaten and want to clean our teeth, so the child makes the connection of why we are going to use a toothbrush. 


Small travel-size toothbrushes work well for children. The toothbrushes can have a case or small enclosure for the toothbrush head and some way to designate which brush belongs to which child (such as a photo of the child). We start by modeling taking our own toothbrush out of the holder and placing it on an empty tray. 


Depending upon the child and their age, we might have the child try each step right after we show it. Or if the child is a little older, we may show a series of steps and then invite the child to try. One of the gifts of Montessori is that we can tailor each activity to a child’s needs and temperament. 


After the child takes their toothbrush and puts it on the tray, the adult selects a toothpaste container and shows how to open and close it. Because we want the child to only use a small amount of toothpaste, it can be helpful to prepare individual portions of toothpaste. Contact lens holders work quite well for this. 


After demonstrating how to select, then open and close the toothpaste container, the adult places it on the tray with their toothbrush and invites the child to select their own toothpaste container, open and close it, then place it on the tray. One critical detail is closing the toothpaste container. We aren’t ready to use the toothpaste yet, so having the container closed helps communicate that we aren’t ready to use toothpaste. We are just making sure that the child knows how to access the toothpaste.


At this point we are getting everything set up, so we want to have the layout prepared for all the steps, including rising our mouths with water after toothbrushing. In the classroom setting, we’ll often have a small pitcher of water and small glasses turned upside down, but at home often just a small glass will suffice. Ideally, the glasses look different from regular drinking glasses because this water will be used for rising rather than drinking. Because this process often happens in the bathroom, small stainless-steel cups work well. Regardless, we next select a glass or cup and pour a small amount of water from the pitcher into it so that the cup is about 1/4 full. We place the cup on the tray with our toothbrush and invite the child to pour water into their own cup and place it on the tray.


Now that everything is set up, we open the toothpaste container and leave it open on the tray. We pick up our toothbrush and wipe bristles into toothpaste. It can be helpful to show how to hold the toothpaste container with one hand while getting toothpaste on the bristles of the brush.


We then place the toothbrush down on the tray and use both hands to close the toothpaste container. The child can also have a turn preparing their toothbrush with toothpaste.


The materials are ready, so it is time to demonstrate brushing teeth! This is best done slowly and with a wide-open mouth. We start on one side, perhaps the left, brushing our top teeth with clear, deliberate downward strokes. We then pause and brush underneath those top teeth. Pausing again, we then move to the back of our left top teeth with downward strokes. Staying on the same side, we brush our left bottom teeth with upward strokes, then the tops of those teeth, then the backs. We pause between each section and repeat on our right side. 


At the end, we brush our tongue lightly. Then we place our toothbrush onto the tray. With almost a bit of exaggeration, we make sure the child sees that we need to spit the toothpaste into the sink. After ridding our mouth of the excess toothpaste, we then pick up the glass and take some water into our mouth. We swish the water around and around and then spit right into the center of the sink, repeating if necessary. It’s nice to also have a small cloth or hand towel to model drying our mouth after this process.


We rinse the toothbrush under the faucet for a few seconds and tap the toothbrush on the side of the sink to get excess water off the brush. Then we invite the child to have a turn with the toothbrushing, spitting, and rising.


At the end, we return our toothbrush to its holder. One at a time we take the used items, the toothpaste container and the cup, to the dirty dish cart to be washed. After the child takes their used items to the dirty dish cart, or at home perhaps another appropriate place, we invite them to brush their teeth whenever they would like to clean their teeth.


Depending upon the child’s engagement while presenting this activity, we may determine different points of interest by using a pause, slightly exaggerating the movement, or merely showing our own intense interest. Some possible points of engagement for toothbrushing can include getting toothpaste on the toothbrush, the downward or upward brushing strokes, swishing water to rinse our mouth, spitting into the sink, or tapping the toothbrush on the side of the sink.


In a school setting, the adult will model and allow the child to practice brushing teeth independently. At home, it’s also best to establish an understanding that at key times, for example in the morning and in the evening, the adult will be taking a turn to help ensure the child’s teeth are clean. For example, during the evening routine, the child gets a chance to clean their teeth, and then they know you, as a parent or caregiver, will then do a final toothbrushing for them. This can be done by putting your hand over the child’s and continuing the brushing process after the child is done, or by just asking the child to hand you their toothbrush when they are done so that you can have a turn brushing their teeth.


The important thing to remember is that we want to support young children as they build the manual dexterity necessary for this important self-care skill. Just like we wouldn’t do all the coloring for them when they want to use crayons, we don’t want to do all the toothbrushing for them when they are learning to use the toothbrush. We want to give the message that they are capable and can practice cleaning their teeth. At home, we also want to make sure they understand that because dental hygiene is so important, we will also have a turn making sure their teeth are clean.


We hope you have great success at home! Let us know how it goes. And if you need some inspiration, you are always welcome to schedule a tour to see how we support children’s development of self-care skills, as well as their sense of capability.

Subscribe to our Blog

You might also like

By Danielle Giordano April 6, 2026
Have you ever watched a Montessori teacher give a lesson and thought, "That seemed...very short!”? If so, you may have witnessed a three-period lesson. What looks almost effortlessly simple is actually one of the most carefully designed teaching techniques. The three-period lesson is the primary way we introduce new vocabulary to young children. We use it constantly for phonetic sounds, geometric shapes, textures, quantities, names of parts of a flower, names of continents, and so much more. Virtually every time children learn a precise new word for something they're experiencing with their senses, we are using a version of this lesson. Why Vocabulary Needs Its Own Method Young children are in what Dr. Montessori called a sensitive period for language. This is a window of time when children’s minds are especially primed to absorb new words and refine their understanding of them. It’s important to keep in mind, though, that absorbing a word isn't the same as truly knowing it. Children might hear the word "rough" many times without ever firmly connecting that sound to what their fingers actually feel on a piece of sandpaper. The three-period lesson closes the understanding gap. It's built on an insight Dr. Maria Montessori borrowed from educator Édouard Séguin. Learning a word happens in stages: first association, then recognition, then recall. Moving through those stages deliberately, with no extra words or distractions to clutter the lesson, gives children's minds the clearest possible path to making a lasting connection. “Both object and name should strike the child's understanding at the same time — but only the name itself, and not some other word, should be pronounced.” — Dr. Maria Montessori, The Discovery of the Child The Simplicity of the Three Stages Here's how the three-period lesson unfolds. We’ll use a classic example of teaching the words "rough" and "smooth" with our sensorial textured boards. 1. ASSOCIATION — "This is..." The adult presents the object and names it clearly, with no extra words. The child repeats the word while experiencing the sensation. "This is rough." The child runs their fingers across the surface and repeats: "Rough." 2. RECOGNITION — "Show me..." After a brief pause, the adult asks the child to identify the object by name. The child simply points or touches, and thus no verbal answer is needed. "Which is smooth? Which is rough?" The child points to each in turn. 3. RECALL — "What is this?" The adult points to an object, and the child produces the name themselves, demonstrating that the word is now truly theirs. "What is this?" The child touches the surface and answers: "Rough." The whole lesson might take only two or three minutes, and this brevity is part of what makes it work. A child's attention is fully focused on precise vocabulary acquisition. What Happens When a Child Gets It Wrong One of the most quietly radical aspects of the three-period lesson is what happens when a child gets it wrong. If a child points to the wrong texture in the second stage, the adult doesn't correct. We don’t say, "no, try again.” Instead, we just end the activity gently, with the understanding that we will try the lesson again another day. Dr. Montessori was clear about this approach. A correction at that moment doesn't help a child learn the word. In fact, a correction only reinforces the feeling of having failed. So we simply close the lesson. The child carries no impression of having gotten something wrong, and when we revisit the lesson, the child comes to it fresh. As Dr. Montessori wrote, an error in the second period is simply a sign that the child "was not at that instant ready for the psychic association.” Nothing is wrong with the child. The teaching hasn’t failed. It just wasn’t the right moment. After the Lesson: When Words Come Alive One of the loveliest things to observe after a successful three-period lesson is what children do next. A child who has just learned the words "rough" and "smooth" will often wander the classroom touching things: the edge of a wooden shelf, a piece of fabric, the surface of a stone, and quietly naming the texture to themselves. The words become tools for understanding the world, and they want to use them everywhere. This spontaneous generalization is exactly what the lesson is designed to spark. The goal is never for children to recite vocabulary on command. Rather, we want to give them language that deepens and sharpens their experience of everything around them. Trying It at Home You don't need Montessori materials to use this approach. Any time you want to help a young child connect a precise word to something they're experiencing (the names of spices by smell, the names of fabrics by touch, the names of tools in the garden), the same three-step structure applies. Name it clearly. Ask them to show you. Ask them to tell you. Keep it brief, keep it joyful, and if they get stuck, simply set it aside and try again tomorrow. The lesson works because it respects how young minds learn. New connections need space, simplicity, and the freedom to form without pressure. To see this vocabulary tool in action, schedule a visit here in [Your Location]
By Danielle Giordano March 30, 2026
Rivers are so important to our human story. They are sources of nourishment, transportation, and connection. We see how children are naturally drawn to water, and rivers offer a powerful way to understand ecology, interdependence, and our place within the natural world. With this in mind, we want to share some of our favorite books about water, rivers, and watersheds. Through story and illustration, children can trace the journey of a single drop of water, observe how land and water shape one another, and begin to understand how human choices affect the health of our planet. We’ve grouped the following collection of river and water-focused books by developmental stage. Each title offers language, beauty, and meaningful context for deeper exploration. Whether you are reading with a toddler, a younger elementary child, or an emerging researcher, these books invite wonder, responsibility, and reverence for one of Earth’s most essential elements. For the Youngest Hey, Water! By Antoinette Portis This picture book takes us on a journey of how water is part of our lives in so many ways: from sprinkler spray to a teardrop trickling. The clean-lined illustrations transition between bird’s-eye views and close-up images. This is a great transition book for toddlers moving from pages with one word labeling a picture to a narrative that connects to daily experience. A Place for Rain By Michelle Schaub, Illustrated by Blanca Gómez A lovely introduction to the concept of rain gardens, this picture book follows a simple story of children witnessing how rain runoff can be transformed from being problematic into something stunning and special for everyone. The sweet, slightly geometric illustrations highlight how even simple actions can have a big impact. Water Is Water By Miranda Paul, Illustrated by Jason Chin Although a picture book about the changing states of water, the lyrical text and charming illustrations make this a delightful and fun-filled page-turner! It’s a great way to introduce young children to the water cycle and the importance of water in our lives. Water Cycle: For Younger Elementary Drop: An Adventure through the Water Cycle By Emily Kate Moon Bridging between comic style and traditional picture book, the story follows the character, Drop, as she travels through the water cycle. Delightful and engaging, this is a great book for younger elementary children and can serve as an easy-to-access resource for understanding the states of water. A Drop Around the World By Barbara Shaw McKinney, Illustrated by Michael S. Maydak Written in rhyming verse, this story follows Drop from a cloud near Maine around the world and back to Cape Cod Bay. A map inside the cover shows the journey, and emoji-style images accompany the text, linking to more detailed descriptions of the amazing science at each step along Drop’s path. Watersheds If the Rivers Run Free By Andrea Debunk, Illustrated by Nicole Wong This captivating picture book takes readers through the human story of rivers’ importance in our lives, the mistakes we’ve made, and how we can make things right and help rivers run free again. The rhythm of the text is accentuated by moments of human realization, with bold statements that step out of the rhyming pattern and gently jar us into a sense of action. The illustrations take readers on a journey, too! One Well: The Story of Water on Earth By Rochelle Strauss, Illustrated by Rosemary Woods Through its clear text and lush illustrations, One Well emphasizes the interconnectedness of water on our planet. It offers an array of interesting information that will appeal to children in elementary years, both through narrative text and short snippets overlaid on the images that fill each page. The fact that this picture book has an index is an indicator of how just how much its 32 pages contains! River Story By Meredith Hooper, Illustrated by Bee Willey Rich in realistic content yet engaging and accessible, this lushly illustrated picture book takes readers on a journey from the source of the river to where it empties into the sea. Watersheds: A Practical Handbook for Healthy Water By Gregor Gilpin Beck, Illustrations by Clive Dobson Best for older readers, this book offers helpful and non-technical information about watershed concepts and environmental concerns. This is an excellent resource for older elementary or younger adolescents engaged in ecology research. The illustrations are beautiful, too! We’d love to hear what you think about these books! You can also download a printable list for the next time you visit your local bookstore or library! Also, feel free to schedule a visit here in [Your Town/Location] to learn more about how the story of water flows through children’s lives!
By Danielle Giordano March 23, 2026
For many of us, we remember learning long division as a confusing sequence of steps to memorize and repeat (bring down, divide, multiply, subtract), often without a real sense of why it works. In Montessori classrooms, long division unfolds very differently. Through the Racks and Tubes material, children get to experience what division actually is. Two Ways to Divide: Sharing and Grouping Before introducing the material, we first clarify an important idea: there are two different kinds of division problems in real life. One asks, “If I share this equally, how much does each person get?” This is partitive division, or division by sharing. The other asks, “If I make groups of a certain size, how many groups can I make?” This is measurement division, or division by grouping. The Racks and Tubes material focuses on partitive division. Children physically share quantities equally and discover what one share receives. Materials like the Stamp Game emphasize division of measurement. Together, these approaches give children a complete understanding of division and help them choose the strategy that best fits a given problem. What Are Racks and Tubes? At first glance, the material is impressive and a little mysterious. Children are often drawn to the material, both for its beauty and its seeming complexity. Racks hold test tubes filled with beads, carefully color-coded by place value: units, tens, hundreds, thousands, all the way up to millions. Matching cups hold the dividend (the number being divided). Boards and skittles represent the divisor (the number doing the dividing). Every detail of the material reinforces place value. Each time children need to make an exchange, they trade in one bead of one category for ten of the next category (e.g. one hundred becomes ten 10’s). This process is visible and incredibly concrete. This material takes intentional focus. It takes time. And it makes the steps of long division clear. How Long Division Becomes Concrete When children solve a division problem with Racks and Tubes, they follow a logical, embodied process: They build the dividend using the racks and cups. They represent the divisor with individual figures on boards. They share beads one at a time, equally, to each part of the divisor. They stop when sharing is no longer possible and then see what remains from that category. They then bring down the next category of beads to continue the sharing process. Each step answers a real question: What does one unit get? What happens when we run out? What do we do with what’s left? Instead of being told “bring down the next digit,” children literally bring down the next category of beads. When exchanges are needed, they perform them physically by trading beads. Remainders are not mysterious leftovers. They are beads still sitting in the cup. Long division becomes a story children can follow. From Material to Abstraction One of the most beautiful aspects of this work is how naturally it leads into abstraction. At first, children record only the quotient. Later, they begin recording intermediate remainders. Eventually, they discover that multiplying the quotient by the divisor tells them how much has been used at each step. This is the very heart of the traditional algorithm. We don’t give abstract shortcuts. Instead we help children discover the pattern. This allows them to own the process. By the time children are working abstractly on paper, the algorithm already makes sense. It matches what their hands have done again and again. Why This Matters The Racks and Tubes material does more than teach division. It teaches: Deep place value understanding Logical sequencing Patience and precision Trust in one’s own reasoning Most importantly, it gives children confidence. Division is no longer something done to them. Instead, they can think through the process, step by step, with meaning and understanding. In Montessori, math is not about getting the answer quickly. It’s about building an understanding of why the process and answer makes sense. And with Racks and Tubes, long division finally does! Schedule a visit to our classrooms in Old Saybrook, CT to see for yourself!
More Posts