Materials Spotlight: The Montessori Bells

Music is a form of language. Because our young children effortlessly absorb language, we, of course, provide them with opportunities to express themselves musically! One key material we use for this is the Montessori Bells.
The bells are perfectly tuned, each designed to deliver a distinct, pure tone when gently played with a mallet. Also aesthetically pleasing, the bells invite children into the world of music. This helps children develop a keen ear for pitch and tone, while encouraging an appreciation of musical instruments and expression.
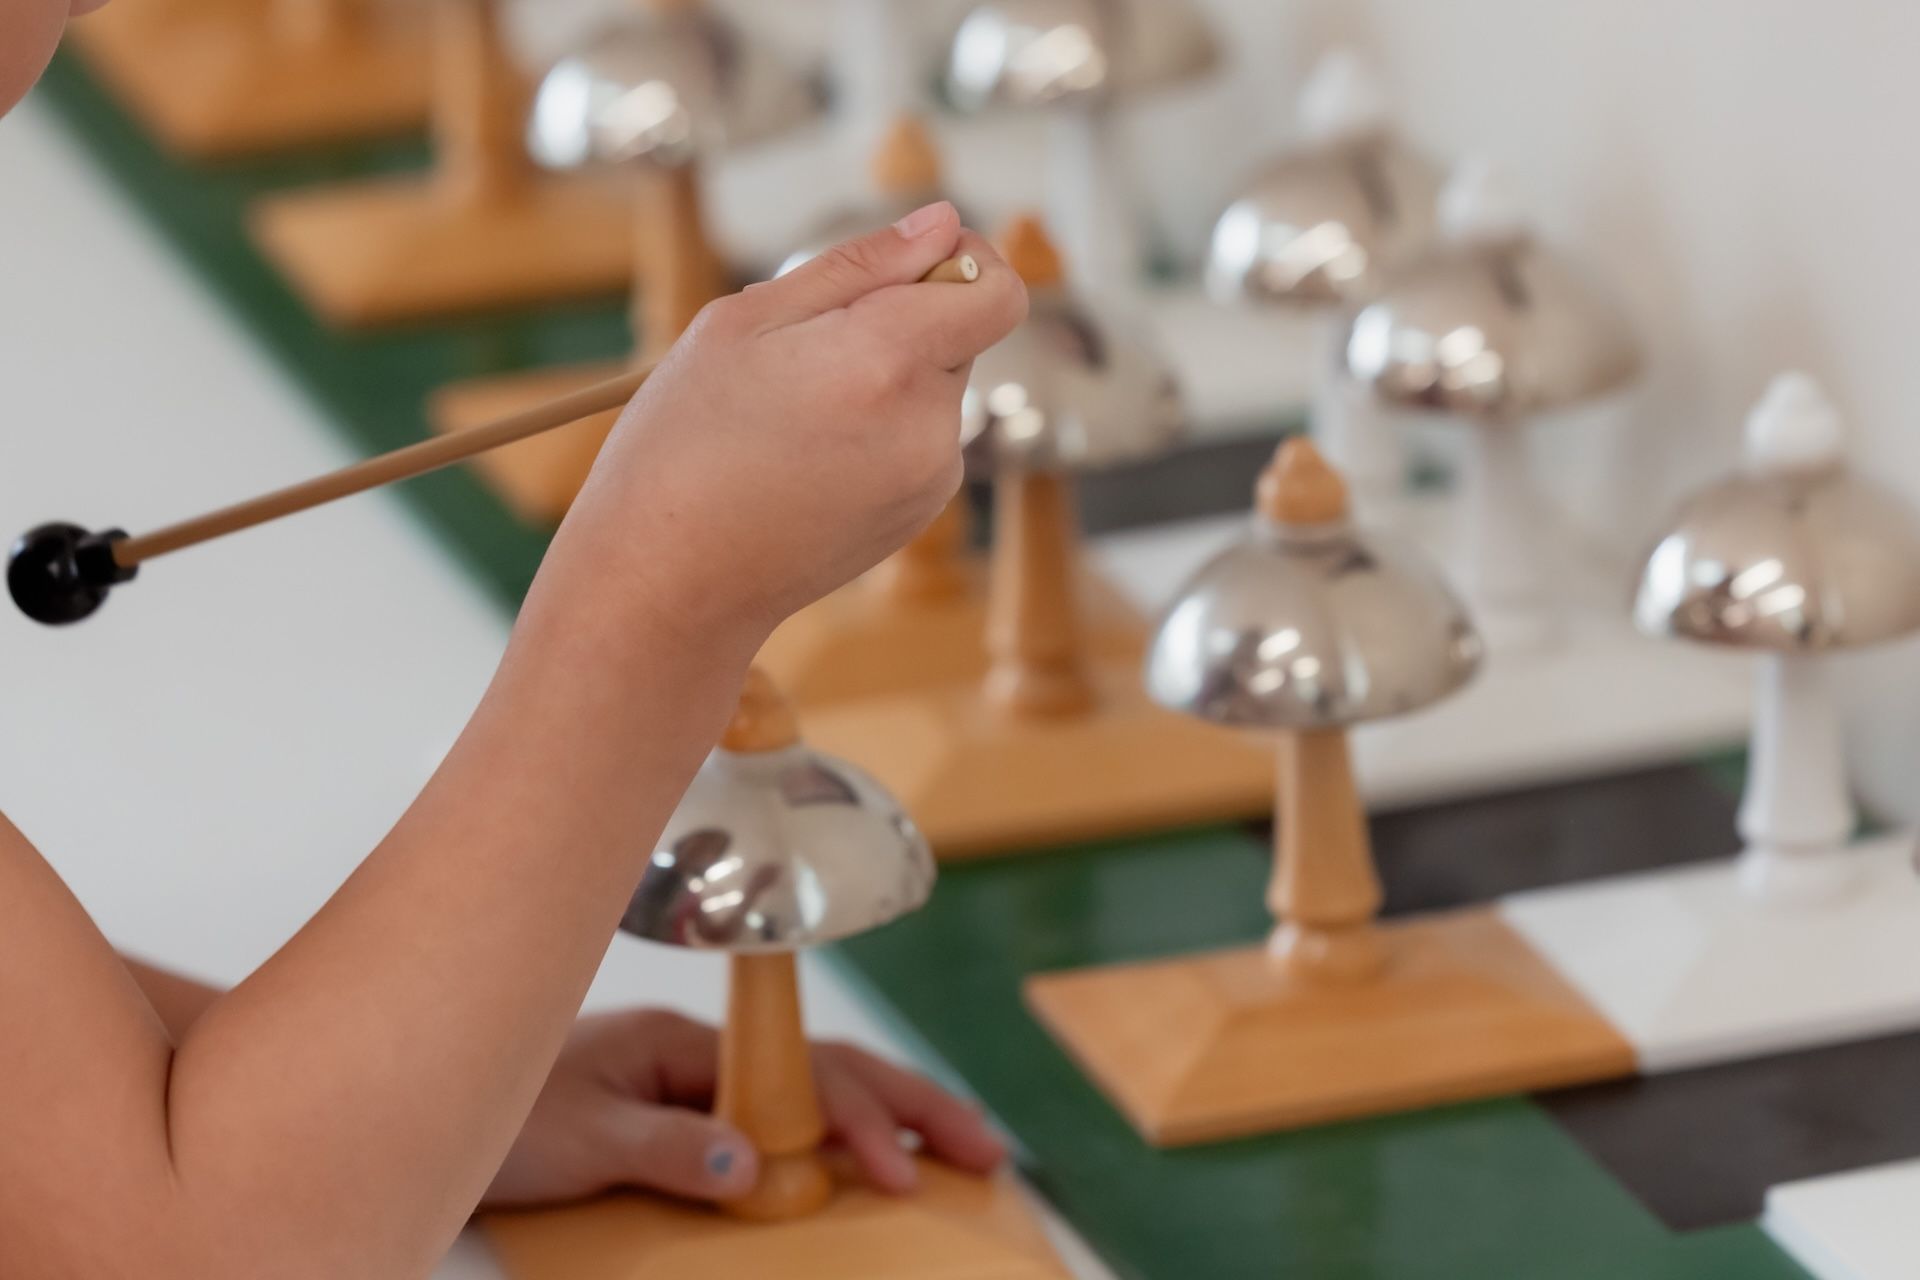
The Montessori Bells
In our primary classrooms, the Montessori Bells are easily accessible on a specially designed wooden stand or table, each bell arranged in order according to its pitch.
There are two sets of 13 bells. One set has black and white stands and is set up in the back to serve as a control and is arranged like a piano keyboard (the white bells represent whole notes, while the black bells serve as the sharps and flats). The other set of bells has stands of natural, varnished wood, so we call them the brown bells. Each brown bell is paired with a white or black bell, and these 13 pairs of bells comprise the chromatic scale beginning at middle C.
The bells sit on boards that also serve as guides. The brown bells rest on a pattern of black and white rectangles corresponding to the keys of a piano.
Playing One or Two Bells
After our youngest children have learned how to care for materials and have had plenty of experience discriminating sounds with our sound cylinders, we show them how to play a single bell. This is a multi-part process: how to carry the bell, use a mallet to gently strike the bell to make a tone, appreciate the sound the bell makes, use a damper to stop the tone, and return the bell to its proper place in the set.
Returning the bell to its proper place prepares children for future work of pairing and grading the bells. So, we take time to model how to check that the tone of the brown bell matches the corresponding white (or black) bell behind it.
Once children learn these steps, they can select any of the brown bells to play. Eventually, we also show children how to choose and play two different brown bells. This experience helps children focus on the fact that the two bells look the same but sound different. Then, upon returning the bells to the set, children also get to work on finding where each brown bells goes (because there are two empty spaces) by matching the tone of the brown bells to the white or black bells in the back.
This may seem like quite an elaborate process for just “playing a bell or two.” However, we carefully break down each step so that even our youngest children can learn how to use this delicate instrument with precision while also beginning to hone in on the slight variations in each bell’s pitch.
Pairing
When we observe children’s success with this initial process, we introduce the challenge of pairing. This experience begins with the adult letting the child know in the lesson that the bells are on their boards in a particular order. We play up the brown bells and down the white bells so the child can hear the gradation and experience the impression of the C scale. Next we model how to remove four brown bells from their boards, mix them, and place them in an open space off to the side.
While showing this process, we reflect aloud how we could match the brown bells to their pairs when we had just two bells. We point out that we can use the same technique to find the matching pairs of the bells we just mixed up and moved to the side.
We start by moving one of the brown bells to a space in front of the first empty white space (always working from left to right). We play the white (control) bell and then the brown bell. If they sound the same, we move the bell up onto the white space on the board. If they sound different, we slide the bell to the right to be in front of the next empty white space and we repeat the process until finding the brown bell’s match and location. When all the brown bells are paired, we again play up the brown bells and down the white bells to check they are in the correct order.
Once we finish modeling, we select the same four bells, mix them to the side of the workspace, and invite the child to pair the bells. We stay long enough to see successful matching of the first bell, then we fade into the background and observe. If the child is successful, we remove the same four and invite the child to do it again. If the first round was successful, we invite the child to remove all the brown bells and pair them!
Grading the Diatonic and Chromatic Scale
After children can pair all eight bells successfully, we introduce grading. This time, children learn how to put all the brown bells in order by paying attention to the degree of difference between each tone. This time, rather than using the white control bells to determine the order of the scale, children mix up and play the brown bells, using their awareness of the change in pitch to compare and reorder the bells. This requires children to have an acute awareness of each tone and how they differ. We start with just the white bells which represent the whole notes, and later introduce mixing in the black bells to make the chromatic scale (with sharps and flats).
Language Material
After children have successfully paired and graded the diatonic scale, we also introduce the “writing and reading” component of the bells. Children learn the symbols and names for the pitches and match the pitches with their notes.
When writing in language, we have thoughts we want to express and we can write them down. Composers have melodies in their heads and they write those melodies by using the notes of the staff.
We use beautiful staff boards with small wooden circles so that children can learn how to place the notes on the staff and eventually even write their own music, similarly to how they write with the moveable alphabet. Like with spoken language, children first explore through writing and then reading melodies.
Subscribe to our Blog
You might also like